Fork me on GitHub

springboot中Controller(3)

Controller的使用

1
2
3
4
5
@Controller: 处理http请求

@RestController: Spring4之后新加的注解,原来返回json需要@ResponseBody配合@Controller

@RequestMapping:配置url映射

实例

1
2
3
4
5
6
7
8
9
10
11
12
13
14
15
16
package com.example.demo;
import org.springframework.beans.factory.annotation.Autowired;
import org.springframework.beans.factory.annotation.Value;
import org.springframework.stereotype.Controller;
import org.springframework.web.bind.annotation.*;
@Controller
public class HelloController {

@Autowired
private boyProperties boyProperties;

@RequestMapping(value="/hello",method=RequestMethod.GET)
public String say(){
return boyProperties.getSize();
}
}

启动,发现访问不了,必须配合模板使用

在pom.xml中添加

1
2
3
4
5

<dependency>
<groupId>org.springframework.boot</groupId>
<artifactId>spring-boot-starter-thymeleaf</artifactId>
</dependency>

刷新一下pom包(idea需要刷新,eclipse不需要)
然后在resourses目录下新建一个目录:templates,在这个目录下新建一个html(index.html)

1
<h2>Hello Spring Boot</h2>

重启:访问 http://127.0.0.1:9111/dev/hello

RequestMapping(url映射)

可以将value值写成一个集合

1
2
3
4
5
6
7
8
9
10
11
12
package com.example.demo;
import org.springframework.stereotype.Controller;
import org.springframework.web.bind.annotation.*;

@Controller
public class HelloController {

@RequestMapping(value= {"/hello","/hi"},method=RequestMethod.GET)
public String say(){
return "index";
}
}

访问;http://127.0.0.1:9111/dev/hi和http://127.0.0.1:9111/dev/hello效果是一样的

另一种方式:

1
2
3
4
5
6
7
8
9
10
11
12
package com.example.demo;

import org.springframework.boot.SpringApplication;
import org.springframework.boot.autoconfigure.SpringBootApplication;

@SpringBootApplication
public class YinxsBootApplication {

public static void main(String[] args) {
SpringApplication.run(YinxsBootApplication.class, args);
}
}

访问:http://127.0.0.1:9111/dev/hello/say

RequestMapping中method的其他方式
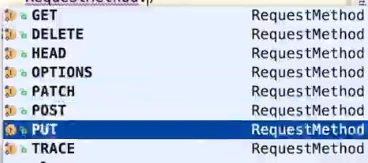
我们常用的方式就是GET和POST方式

1
2
3
4
5
6
7
8
9
10
11
12
13
package com.example.demo;
import org.springframework.stereotype.Controller;
import org.springframework.web.bind.annotation.*;

@Controller
@RequestMapping("/hello")
public class HelloController {

@RequestMapping(value= "/say",method=RequestMethod.POST)
public String say(){
return "index";
}
}

我们在浏览器就访问不可;可以使用postman的post方式。
如果你什么方式都不写,那么post和get就兼容了。但是不推荐。

处理参数

1
2
3
4
5
@PathVariable 获取url中的数据

@RequestParam 获取请求参数中的值

@GetMapping 组合注解
url中

代码:

1
2
3
4
5
6
7
8
9
10
11
12
13
package com.example.demo;
import org.springframework.stereotype.Controller;
import org.springframework.web.bind.annotation.*;

@RestController
@RequestMapping("/hello")
public class HelloController {

@RequestMapping(value= "/say/{id}",method=RequestMethod.GET)
public String say(@PathVariable("id") Integer id){
return "id: " + id;
}
}

访问:http://127.0.0.1:9111/dev/hello/say/1

返回:id:1

传统方法
1
2
3
4
5
6
7
8
9
10
11
12
package com.example.demo;
import org.springframework.web.bind.annotation.*;

@RestController
@RequestMapping("/hello")
public class HelloController {

@RequestMapping(value= "/say",method=RequestMethod.GET)
public String say(@RequestParam("id") Integer myId){
return "id: " + myId;
}
}

不管是get还是post都是@RequestParam

访问:http://127.0.0.1:9111/dev/hello/say?id=1111

返回:id:1111

如果不传id设置一个默认值

1
2
3
4
5
6
7
8
9
10
11
12
package com.example.demo;
import org.springframework.web.bind.annotation.*;

@RestController
@RequestMapping("/hello")
public class HelloController {

@RequestMapping(value= "/say",method=RequestMethod.GET)
public String say(@RequestParam(value = "id",required = false,defaultValue = "0") Integer myId){
return "id: " + myId;
}
}

这样访问不传id默认为0

GetMapping

1
2
3
4
5
6
7
8
9
10
11
12
13
14

package com.example.demo;
import org.springframework.web.bind.annotation.*;

@RestController
@RequestMapping("/hello")
public class HelloController {

// @RequestMapping(value= "/say",method=RequestMethod.GET)
@GetMapping(value = "/say")
public String say(@RequestParam(value = "id",required = false,defaultValue = "0") Integer myId){
return "id: " + myId;
}
}

同注释掉的功能

PostMapping

同post方式

显示 Gitment 评论